

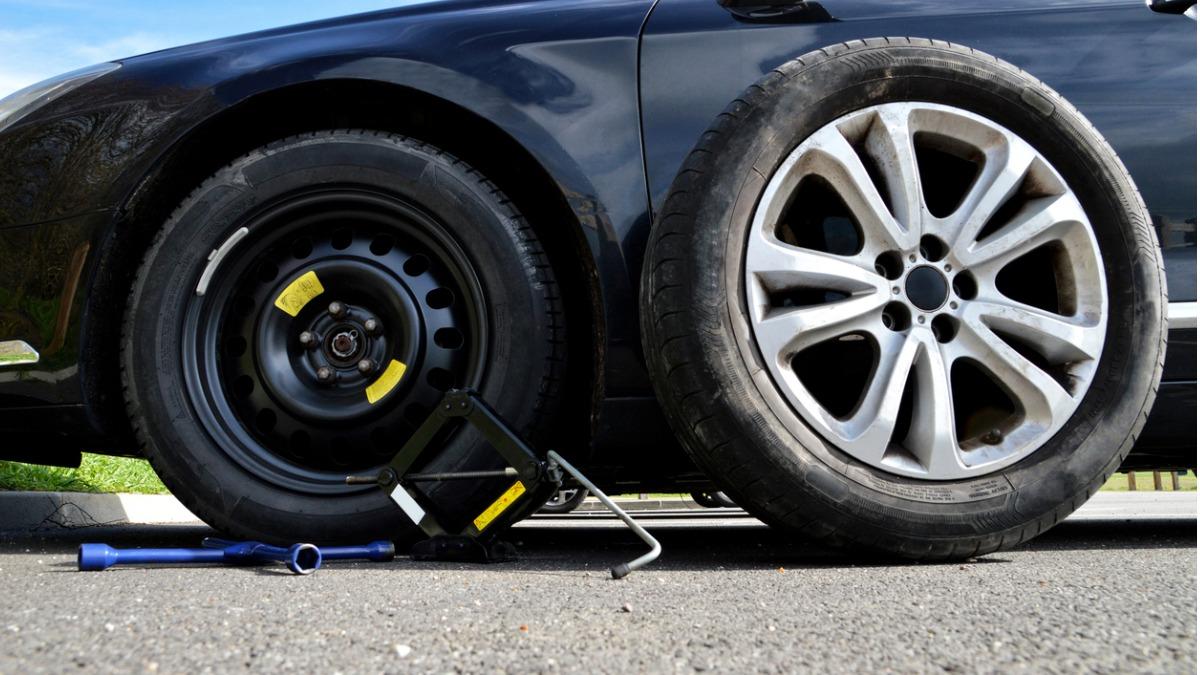
When you are suddenly stranded on the side of the road because your tire has lost pressure, been damaged, or had a blowout, it’s important to know how to change it. Many vehicles include the necessary tools and instructions to replace or repair a tire in an emergency.
We’ll cover what to do when you find yourself in this predicament, how to safely replace the tire yourself, and how to get back on the road. Check out the video below, too.
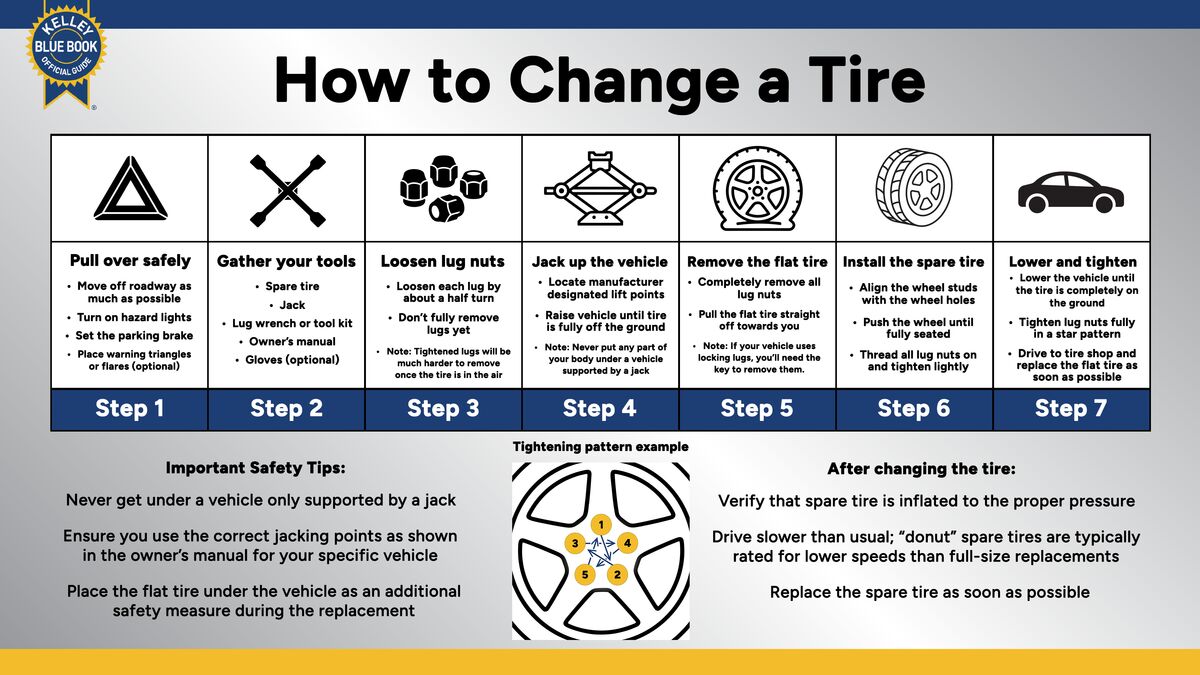
Step 1: Pull Over Safely
When actively driving (especially at highway speeds), a loss of tire pressure can be dangerous and unpredictable. It’s important in these moments to stay calm, slowly reduce speed, and pull away from the roadway to a safe location. Once you’ve made it safely to a level patch on the side of the road, turn on your hazard lights, set your parking brake, and place emergency signage or signals like warning triangles and flares behind your vehicle to help other drivers see you better, especially at night.
At minimum, you will need a handful of tools to replace your tire. Most vehicles are equipped with emergency tools from the manufacturer. Typically, you’ll find your tools in the trunk, under the floorboard, or in a secure storage location toward the rear of the vehicle. It’s important to check your owner’s manual if you’re not sure where to find yours, and if your vehicle is missing these tools, you should replace them before the next emergency.
The tools you’ll need include:
- A spare tire or patch kit
- A jack to lift the vehicle
- Lug wrench or mechanic’s tool kit
- Owner’s manual
- (Optional) Gloves
Step 3: Loosen Lug Nuts
Now that you have your tools ready, it’s time to start the replacement. You’ll want to begin by carefully loosening all your lug nuts by about a half turn. When the tire is lifted, fully torqued lug nuts can be much more difficult to remove because the wheel tends to spin on the hub, so it’s important to loosen them on the ground.
Safety note: Do not fully loosen your lug nuts while the vehicle is still resting on your wheel! Be sure that there is no weight on the wheel before removing all of the lugs.
Step 4: Jack Up the Vehicle
It’s time to lift the vehicle slightly so we can remove the wheel. To do so, you’ll need a jack. Typically, most cars include a basic scissor or piston jack. While these types of jacks are compact and simple to operate, they are also less stable than the typical floor jacks you might see in a repair shop. Use caution and care when operating them.
Before you lift your vehicle, consult your owner’s manual to ensure you’re lifting from a safe jacking point. These are often designated locations on your frame or underbody that have been factory-reinforced to handle lifting pressures. Be sure to check that the parking brake is installed and the wheels are prevented from rolling.
Pro tip: Wheel chocks are an inexpensive safety tool perfect for this situation, but you can also use wood scraps, rocks, or other solid objects to prevent the vehicle from moving.
Lift your vehicle until the tire you want to replace is a few inches off the ground. You shouldn’t have to lift any further; just enough to get the old wheel off and the new wheel installed.
Safety note: Do not put any part of your body under a vehicle that is only supported by a jack. Cars are very heavy and can significantly injure you in an accident. Be careful!
Step 5: Remove the Flat Tire
With the tire in the air and lug nuts removed, you can now take off the old wheel and tire. Pull directly away from the vehicle toward yourself, and the wheel should come off easily. If your wheel is stuck on the hub due to rust or corrosion, it may require a penetrating fluid or percussive maintenance (i.e., gently hitting the wheel with a hammer or similar tool).
Once you’ve removed the wheel, place it under the vehicle, next to the jack. The old wheel provides an additional safety net should the jack fail, preventing your vehicle from landing on the ground. Be careful not to disturb or bump the jack when doing this; keep in mind that it is under the vehicle’s weight and strain.
Step 6: Install the Spare Tire
Now it’s time to install your replacement tire, or if you had a repair kit handy, your repaired tire. In the same way you removed the old wheel, lift the new wheel and rest it on the wheel studs. Once the wheel is in place, you can start hand-threading the lug nuts on. It’s important to ensure that the wheel is sitting flush against the hub, with the lug nuts mostly tightened before you lower the vehicle.
As you tighten the lugs, follow a star-shaped pattern. This ensures you get even pressure and helps the wheel seat fully. If your old wheel is still under the vehicle, you can now remove it and place it into the trunk.
Step 7: Lower and Tighten Lug Nuts
Your spare tire is on, secured, and ready to support the vehicle’s weight. At this time, you can lower the jack until the car is resting on the tire. Follow the same star-shaped tightening pattern as before, now securing the lug nuts and wheel completely. Return the jack and any tools to their proper locations in your vehicle and remove wheel chocks or other stabilizing objects from the other wheels.
Once you’ve completed a quick visual inspection and double-checked that the lugs are fully tightened, take the original tire to a shop to have it replaced as soon as possible.
Many vehicles come with smaller “donut” style spare tires, which are meant to be driven on at lower speeds and replaced quickly. Even if your vehicle comes with a full-sized spare tire, it’s important to repair or replace the bad tire, so you have an extra tire handy for the next emergency.
With the skills to change your tire under your belt, you’ll be more prepared to hit the road with confidence. For more maintenance advice, check out our Car Maintenance and Repair Information Center.
Editor’s Note: We have updated this article since its initial publication.